Writing Text to an EPaper Display
17th Mar 2025
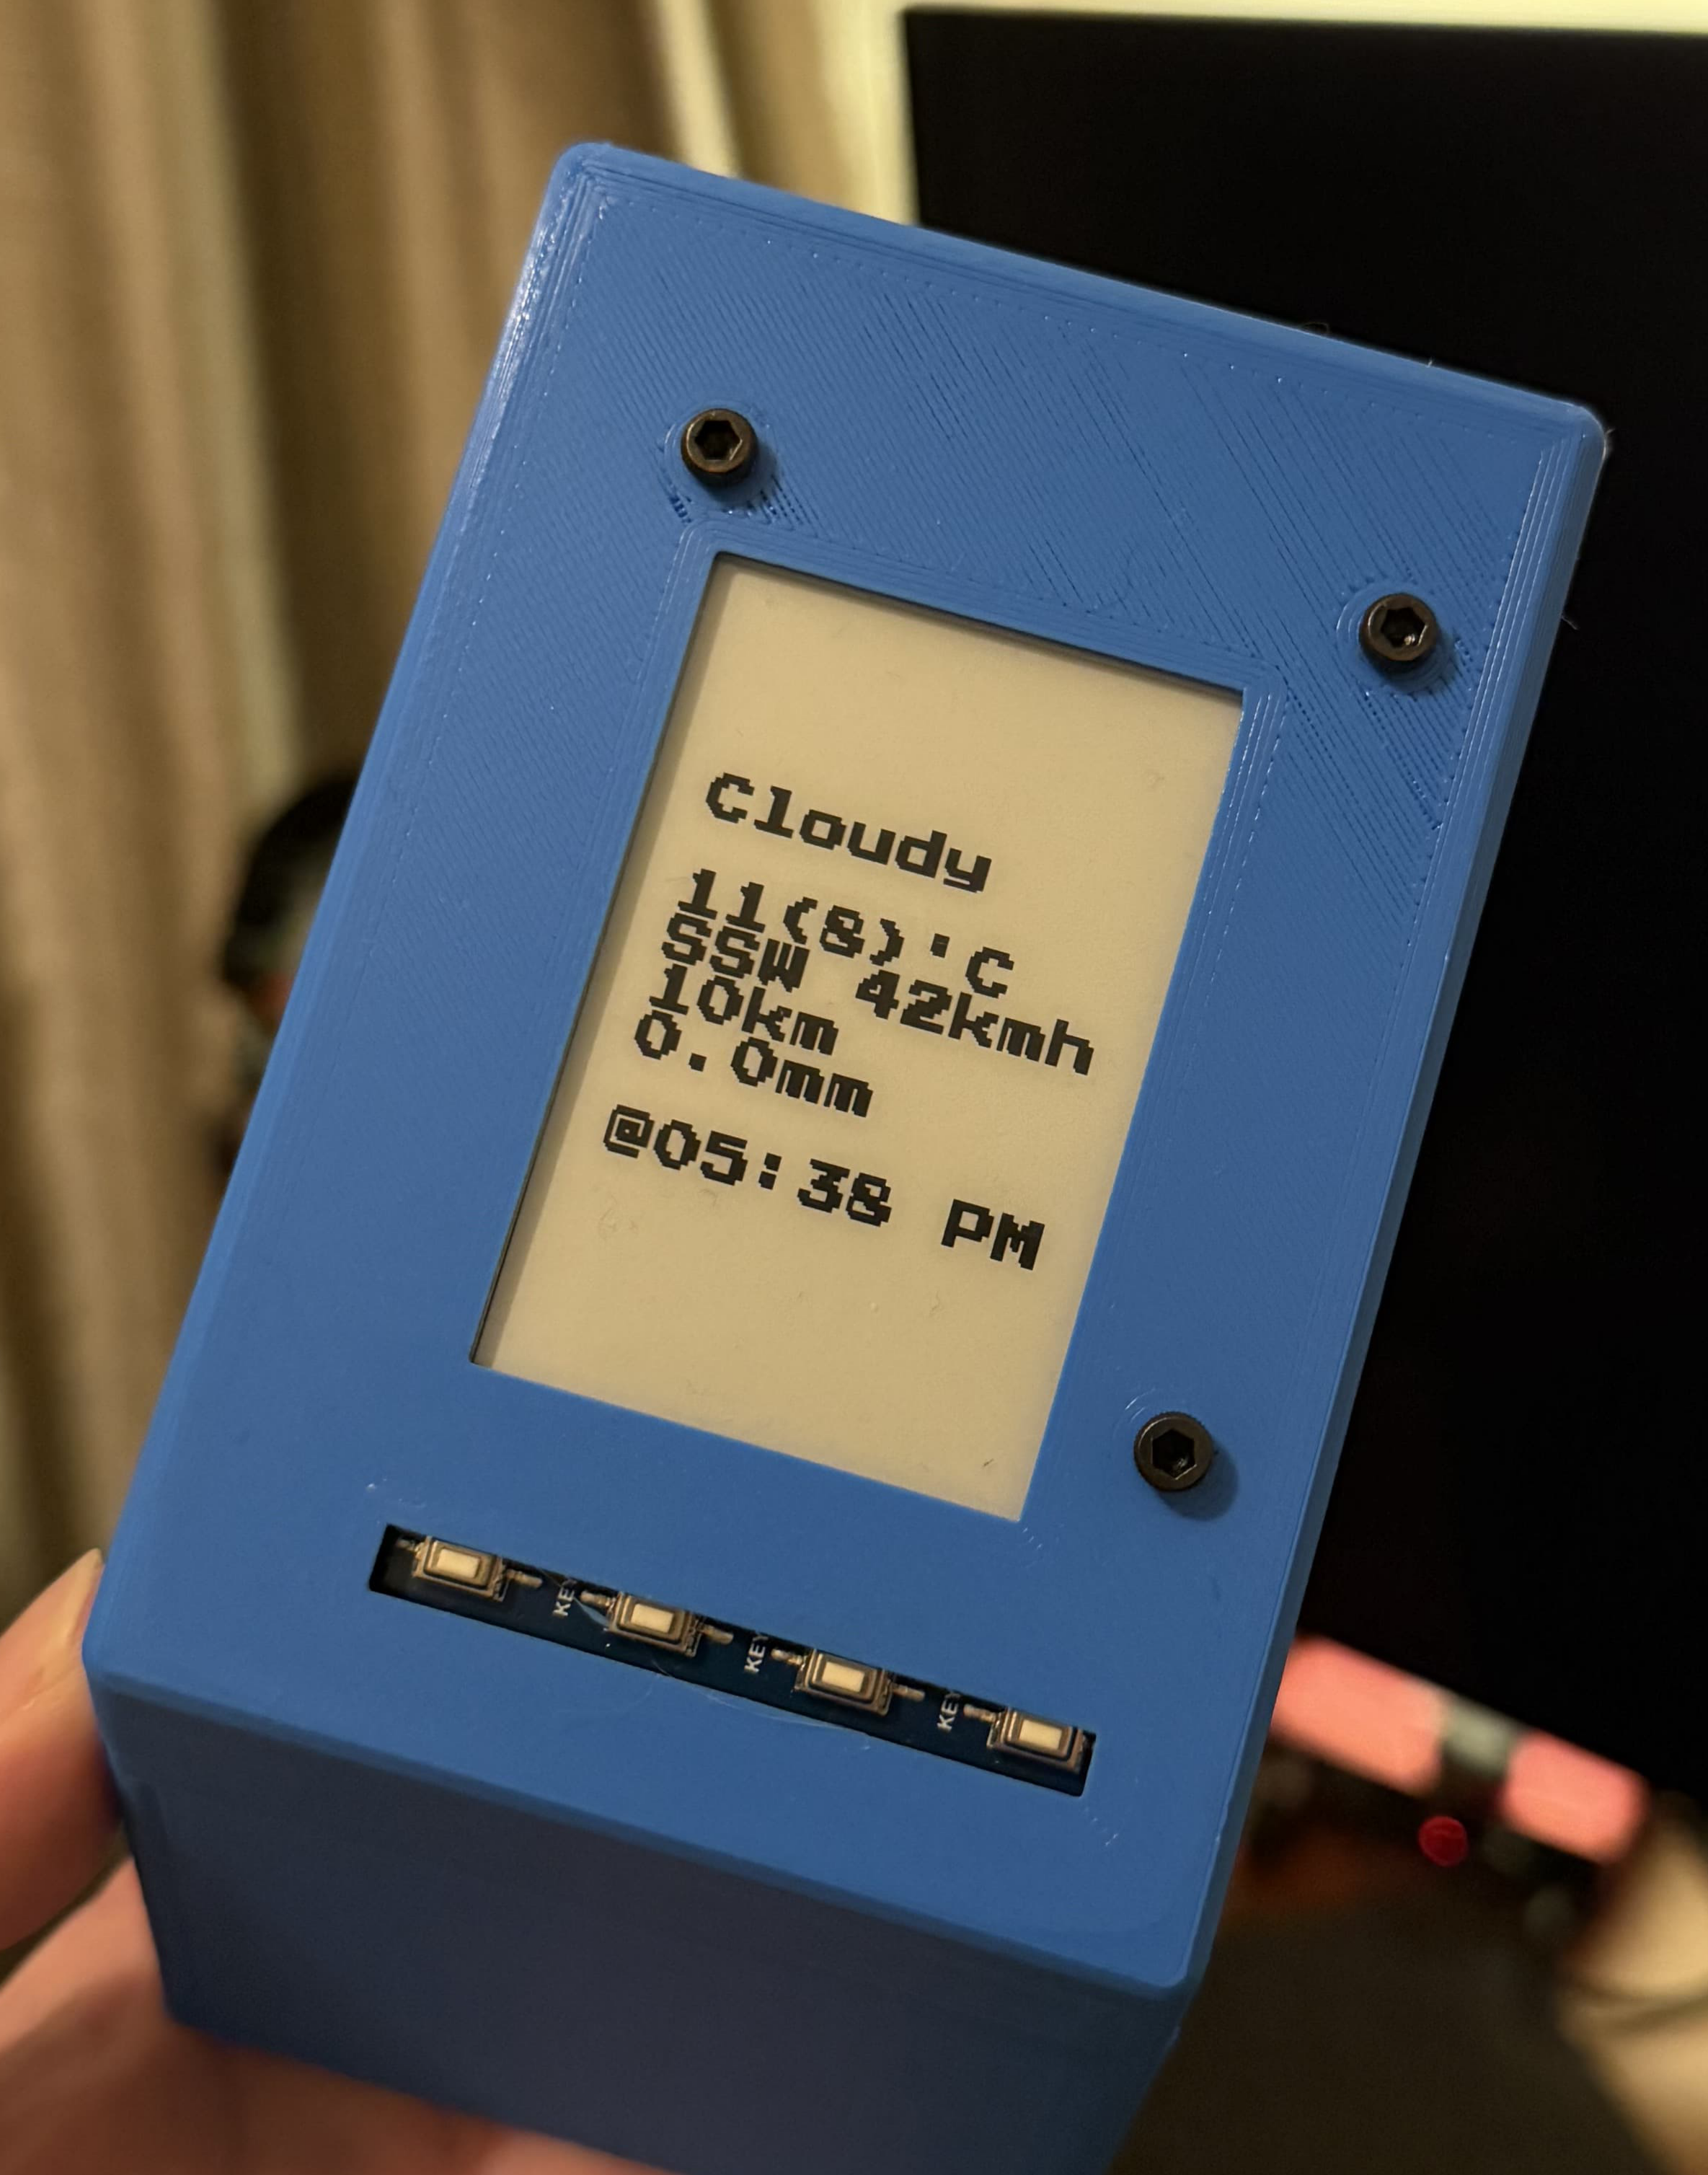
Making Things EPaper MicroPython ESP32I recently worked on a project to build a wireless weather display using an ESP32, MicroPython and an EPaper display. This was a fun project, I used a lot of technology that I hadn't used before. In fact, I hadn't used any of the core technology used in the project before so it involved loads of learning for me! I made a video documenting the whole thing on my YouTube channel; however, one thing I kind of glossed over was the process of writing the individual bits to the screen to flick on and off the pixels correctly to make shapes and specifically text of a certain font appear properly. In this article I'm going to deep dive into how this actually works.
If you want to check out all the code for this project, you can find it here on my GitHub.
Background
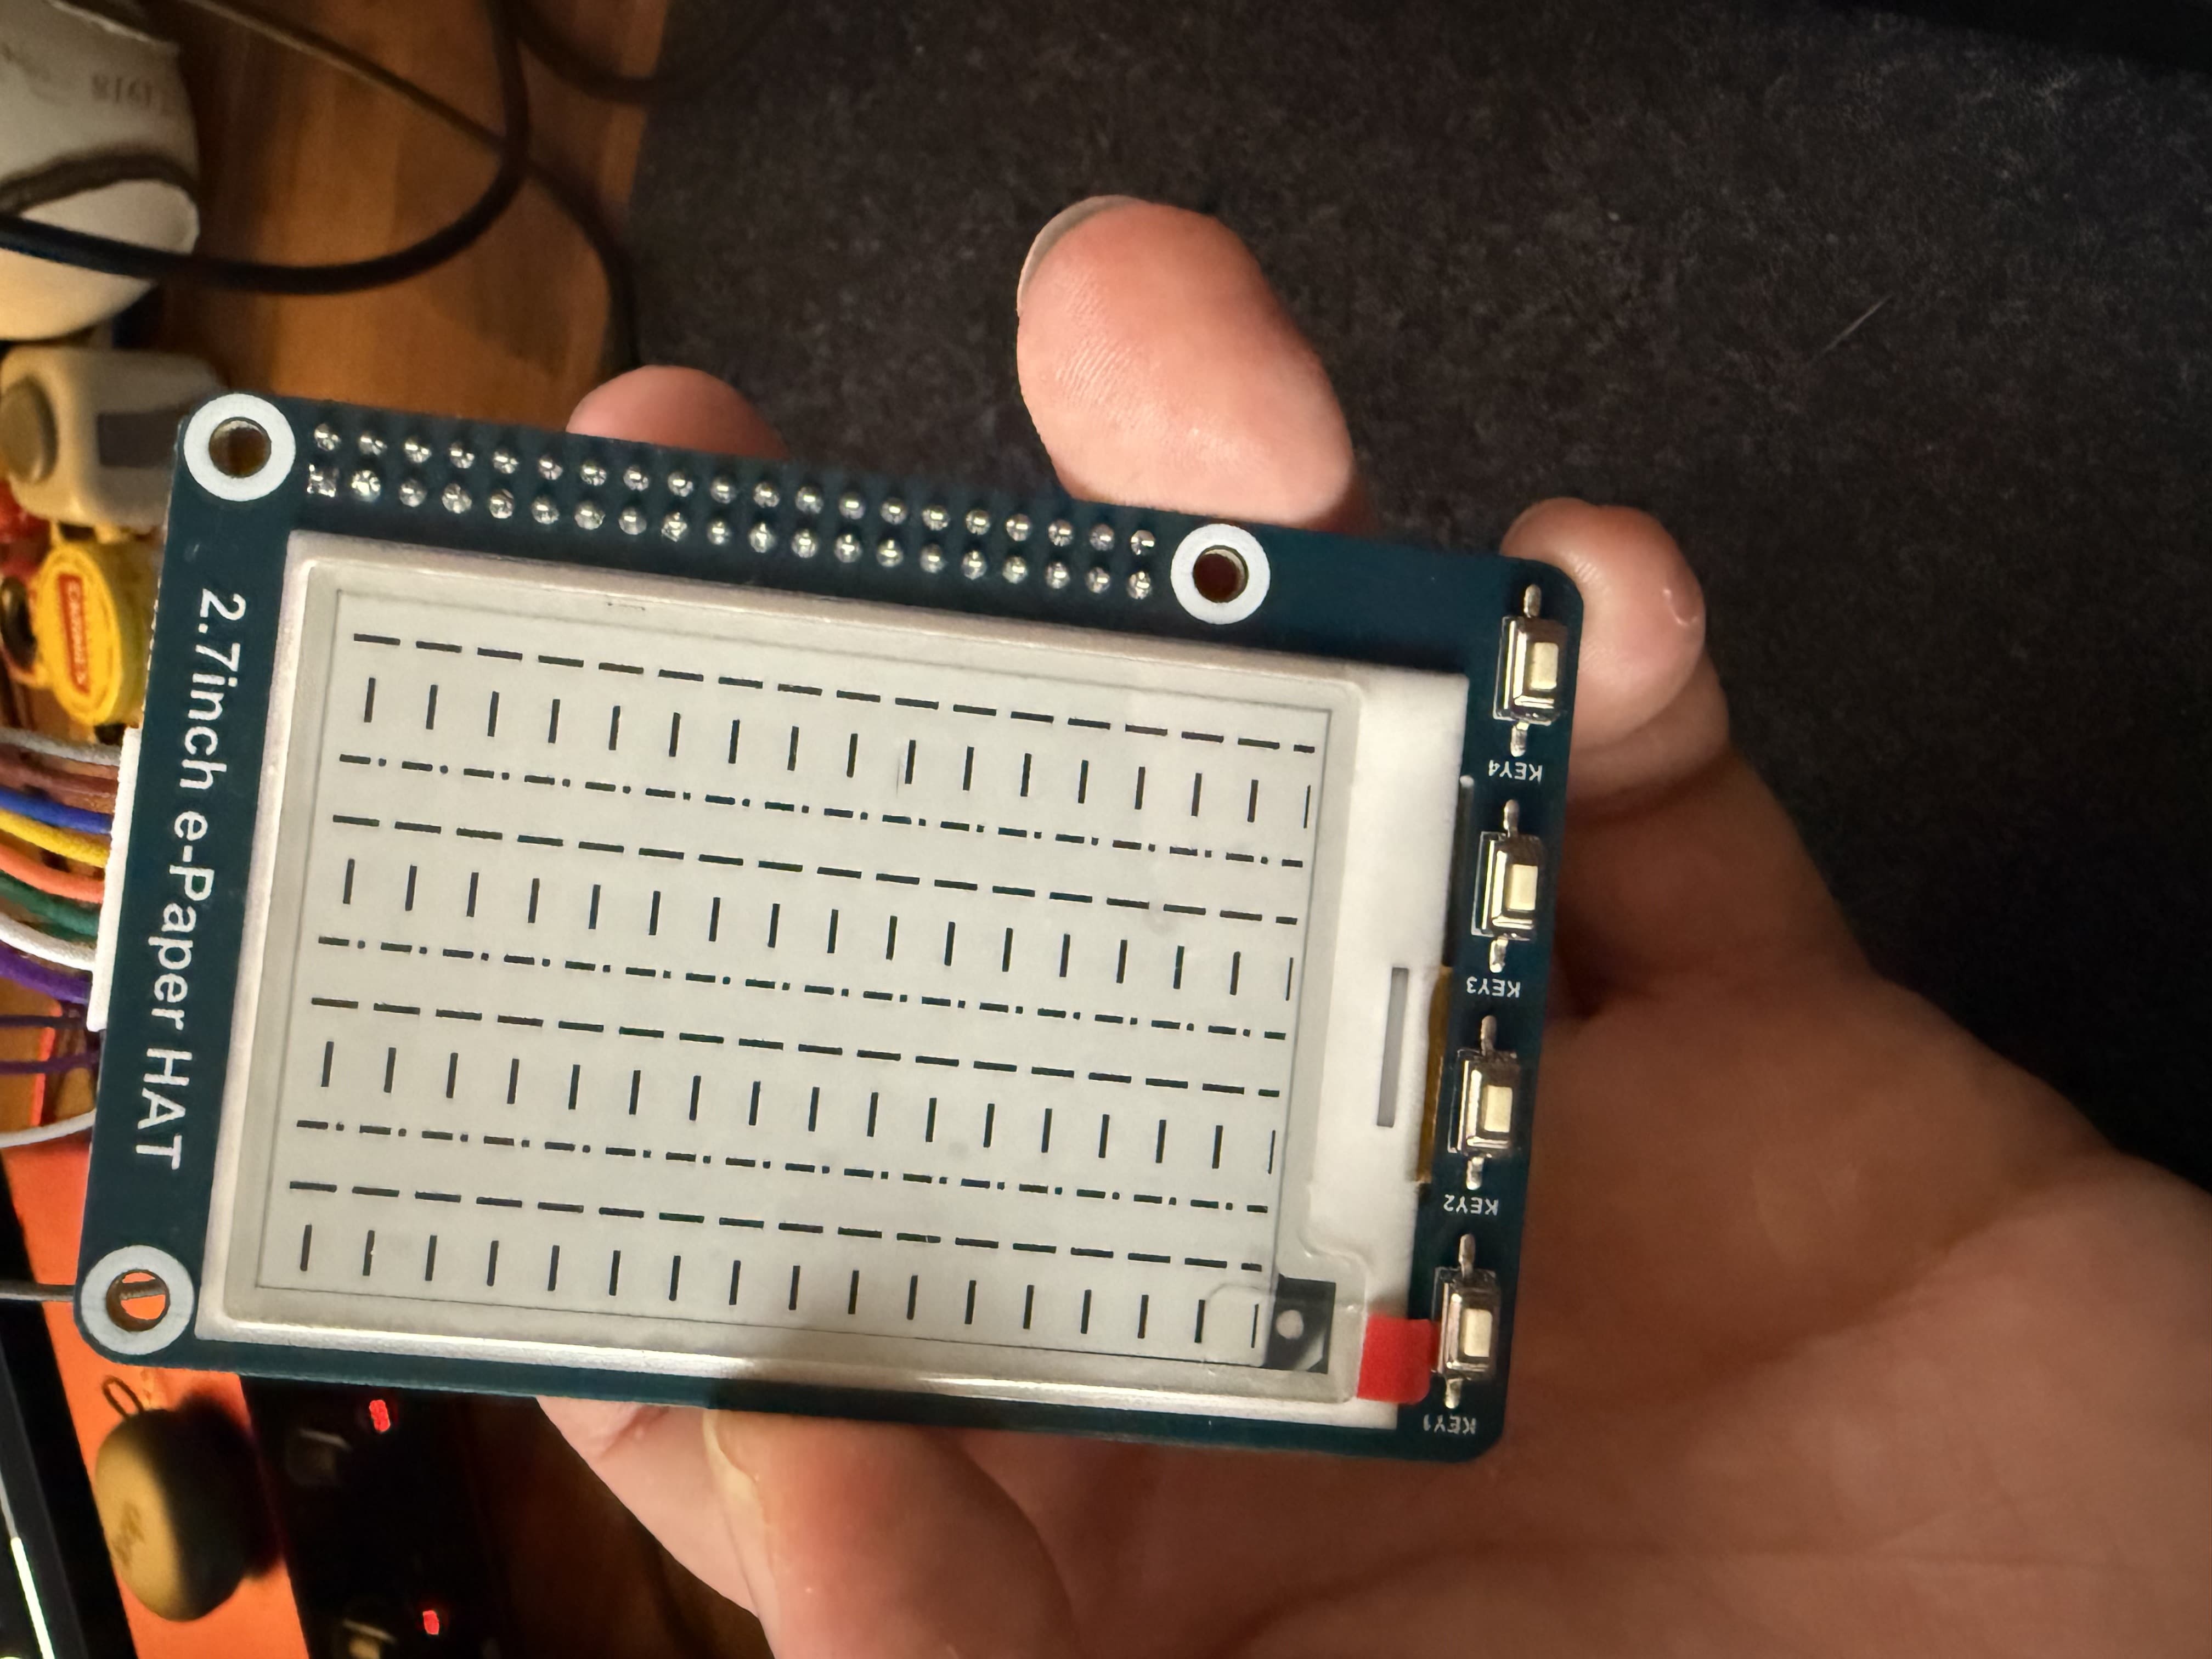
The screen I used for this project is a Waveshare 2.7" EPaper display, specifically the V2 of this screen. You can learn more from their excellent documentation here.
I'm not going to go into any huge detail here as to how to actually interface with the screen, but at a very high level, the screen uses the SPI (Serial Peripheral Interface) standard to commuincate with external devices to render data to the screen. The above linked manual has all of the details about this, but the rough outline of how the device operates is that internally it has flash memory which stores byes of data sequentially. Depending on the memory address of any given byte, this represents either a 1 or 0 for a specific pixel on the screen. When we interface with the device, we write bytes to it's memory via the SPI bus, we then give the device a command to refresh it's screen. During it's refresh cycle, it pulls out the individual bits of it's memeory registers and either turns on or off the corrisponding pixel on the screen. This leaves us with either a dark black spot or the screen base white appearence.
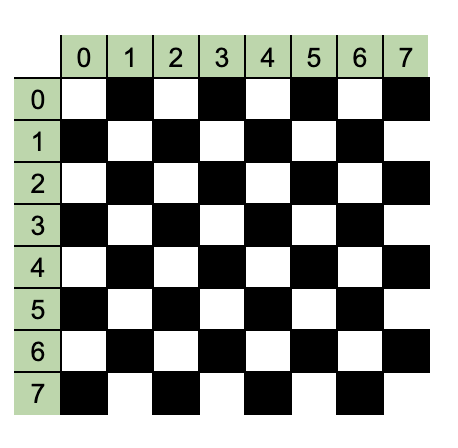
Let's take a simple example. If the screen were only 8x8 pixels, we would have a grid of 64 individual bits making up the screen. This would corrispond to 8 sequential bytes in memory which would map to the screen as below.
![]()
You can see here how the layout of the pixels matches the sequence of bytes written to the devices memory. So in this example if we wrote the hex bytes 0x55 (01010101 in binary) and 0xAA (10101010 in binary) to memory as a sequence like so - 0x55, 0xAA, ..., 0x55, 0xAA; we would end up with a checker board pattern like below.
Drawing Characters
As we have seen, it is relatively easy to flip an individual bit on or off on the screen. Once you know the x and y coordinate of the bit on the screen you can do some simple maths to work out which bit in which byte of the sequential memory it corrisponds to. What is harder to do is generate characters or more complex shapes on the screen. For this, we need to write some driver software that will take data render it to the screen by coming up with the correct byte sequence to render it on screen in a human redable way. I approached this in a very simple way which would allow me to write just plain text in some font to the screen. Waveshare themselves have some great examples of driver code you can look at that do more complex things than I did, but we won't go into that here, we are just going to talk about how I got simple font to render on the screen.
To start off, we need to think about how we will actually represent fonts on the screen. In the above example, we had 8x8 pixels, this isn't a huge amount of pixels to work with, in fact, on our screen which has 264 x 176 pixels, and 8x8 grid of pixels is just about enough visual space to draw a single character, and a very small one at that. This was my starting point to try and figure out how I was going to write characters. I reasoned that writing a character was just a matter of knowing what precanned grid of pixels I needed to write to memory in what order to generate the correct pattern for the screen. In my case, I picked 16x16 to be the smallest grid size I would use (one character), I decided this to make sure that the characters were easier to read on the screen. With this character sizing and my screen in the verticle orientation; I would be able to write 11 characters (176/16) per line, with a total of 16.5 (264/16) lines. Ignoring the half a line at the bottom of the screen, this means this scheme would allow me to write 176 total characters to the screen.
Let's move back to our earlier example of an 8x8 pixel character to show an example of how we construct the font. Let's say we want to write the character + to the screen. This is fairly simple, using our 8x8 grid it might look something like the below.
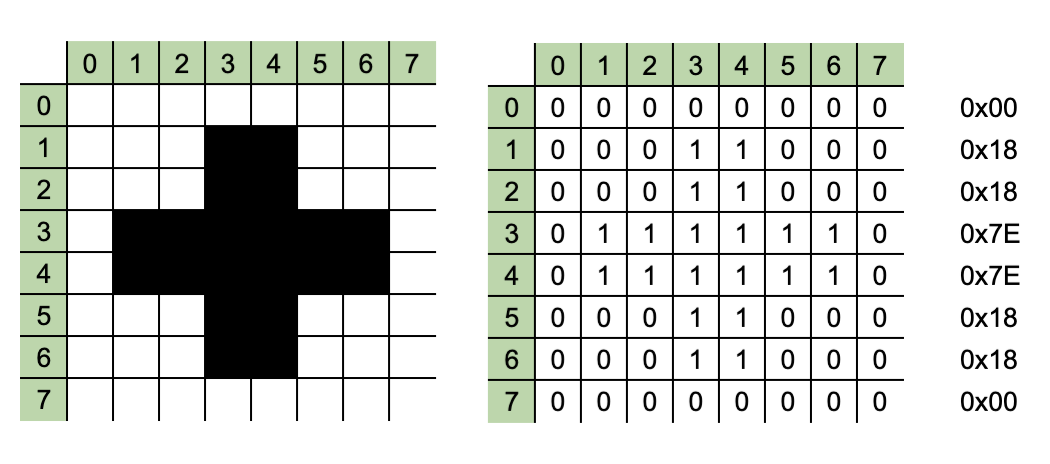
With this byte pattern known in advance for any 8 bit character, we can create and store a lookup of characters represented by an array of 8 bytes each for all of the characters in any font we want. You can see my font lookup file here from my project (remember mine is 16x16, so instead of each character being a single array of 8 bytes, it's a two dimensional array of 16 arrays of 2 bytes each). If you are still finding this hard to visualise, I wrote some example code which you can find here, it spits out a text file which mirrors the output using . and #.
All that remains is the algorithm for getting the sequence of bytes correct as you iterate through each letter you wish to write to the screen. I implement an algorithm for solving this here however, there are multiple ways you could do this. What is more important than the code is understanding the problem, so lets explain what is going on. When we have our 8x8 example, each byte in the array of 8 bytes sequentially matches the memory locations order. So writing each byte in order writes each line of the character. However, is only works if we are writing one single character for the entire screen. Let's look at a slighter larger screen, this time it's 16x8 and so we can write two characters side by side on our screen. In memory this looks the same, sequential bytes, but layout on the screen changes a bit and we end up with the individual bits representing our characters being split across sequential memory locations.
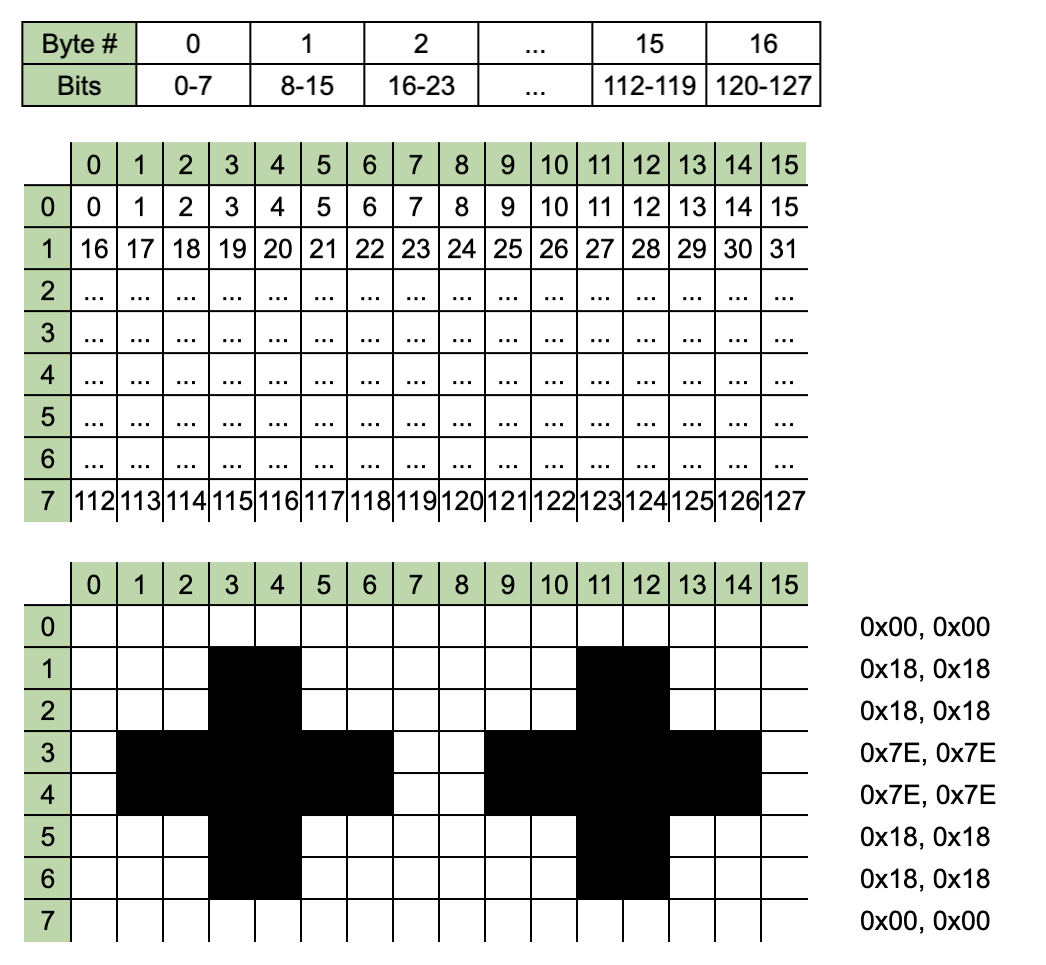
From the above you can see that we still need to write the bytes to memory in sequential order, but our lookup now spans two characters, in this example, they are the same, but with different characters, the bytes will change. This makes it more complicated. This still isn't very hard, it's relatively basic modular arithmitic to find the correct index in your lookup dataset, but if you don't draw it out, it can be a little hard to get your head around. I hope this has explained it well enough.
Generating Fonts
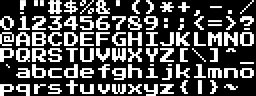
The last piece of the puzzle for getting readable fonts written to the screen is to consider how do we actually generate nice looking fonts to store in our lookup tables. This is where I struggled for a bit. My initial tests for this were all just handed coded. I was able to easily write up the byte pattern for a !, - and, | (which you can see at the top of this article!). However, I wanted to atleast represent the entire basic ascii table for a font, and what's more, I did NOT want to write this out by hand. My thoughts then turned to how I could generate a raster map of a font if I could find a ttf file for the font. These files are widly available on the internet and I found a blocky looking retro video game font I thought would look good, "Press Start 2P".
From here I was stuck as to what to do next. I wanted to write some simple python code to extract the individual bits and their positions but I really didn't want to dive very deep into how to work with TrueType fonts. This is when I came across this wonderful tool that converts font files into bitmap images. Bitmaps are designed to render out a set of reusable assets in a single image. You can load that asset into memory by reading in the individual pixels at a specific grid location in the main image. Using the above tool, I was able to generate a bitmap of the basic ascii table for my font.
With this I was able to write some code to parse each pixel of this image and generate the bits I needed to build my lookup. Combining all of the above then, I was finally able to write out characters to my screen in a readable font that looked cool.
What's Next?
I don't have any specific plans to do more work on this project. It worked out really well and I am pretty happy with the code and tools I used to get here. I think this is just something I will keep in my back pocket for if I want to work with this kind of EPaper screen again!
If you enjoyed reading this article and would like to help funding future content, please consider supporting my work on Patreon.Keep on making things
-Ian